Setting up a Kubernetes cluster in Azure
Generalizing Specialist - that's just hyperbole for "jack of all, master of some". Dev for 20+ years with curiosity still intact.
All the major cloud providers provide managed Kubernetes services these days that are an apt choice for production environments. I was curious about the mechanics of cluster setup and therefore created a tiny two node cluster in Azure using Kubeadm tool just for learning purpose. While the authoritative source of information is of course Kubernetes documentation, here are some quick notes:
Creating VMs in Azure
- It's a good idea to create all Azure resources under one Resource Group. You can then delete all of those in one go once you are done by deleting the RG.
Creating a SSH key in Azure and using it to log into different VMs makes life so much easier. Here is how you can do it. Create it with a name of your choice (azureuser in this post) as shown in the screenshot below:
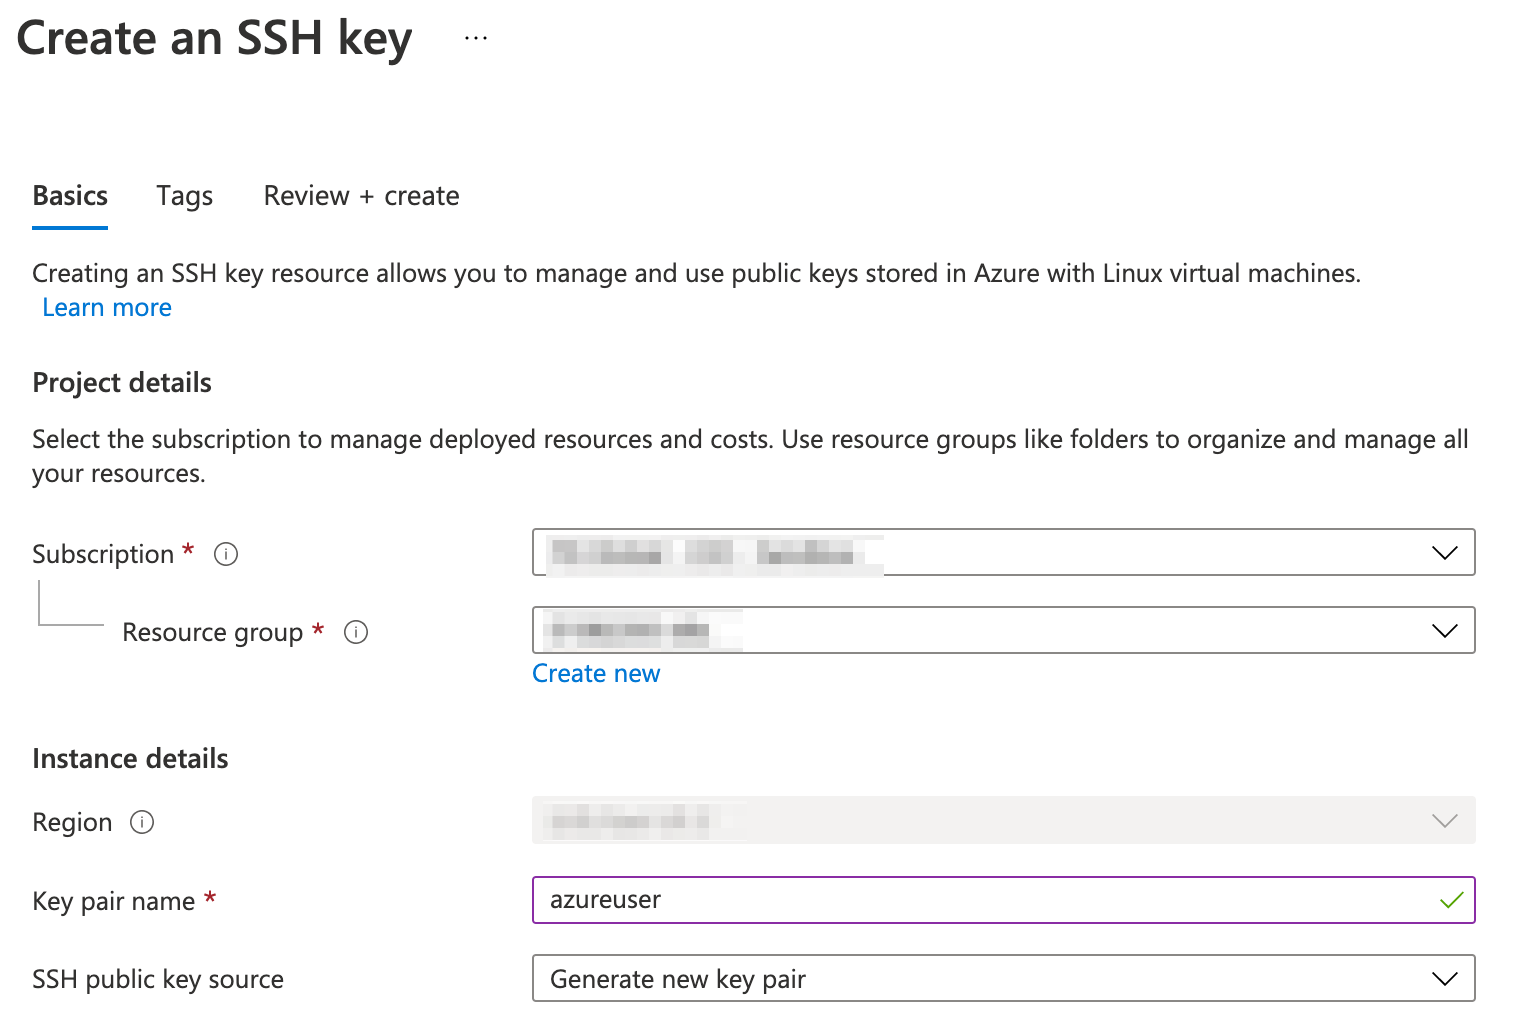
After creation, Azure will prompt for saving the generated private key file. Download it and keep it at a known location on your machine, e.g.
~/.ssh/azureuser.pem. Change the permissions -chmod 400 azureuser.pem.- Create a virtual network with required address range, for example:
10.100.0.0/24(10.100.0.0-10.100.0.255). IPv4 CIDR Calculator is a handy tool to calculate CIDR IP range. - Adjust the
defaultsubnet IP range under the virtual network to10.100.0.0/25(10.100.0.0 - 10.100.0.127). We'll use this subnet for the Kubernetes cluster. - Create a Network Security Group and associate it with the default subnet. The inbound and outbound rules provided out-of-the-box are good enough.
- I always use bastion service to avoid exposing VMs to internet. You can either associate an existing bastion or create a new one while creating a VNET. In Azure portal, a new bastion can be created while creating a VNET from the Security tab as shown in the screenshot below:
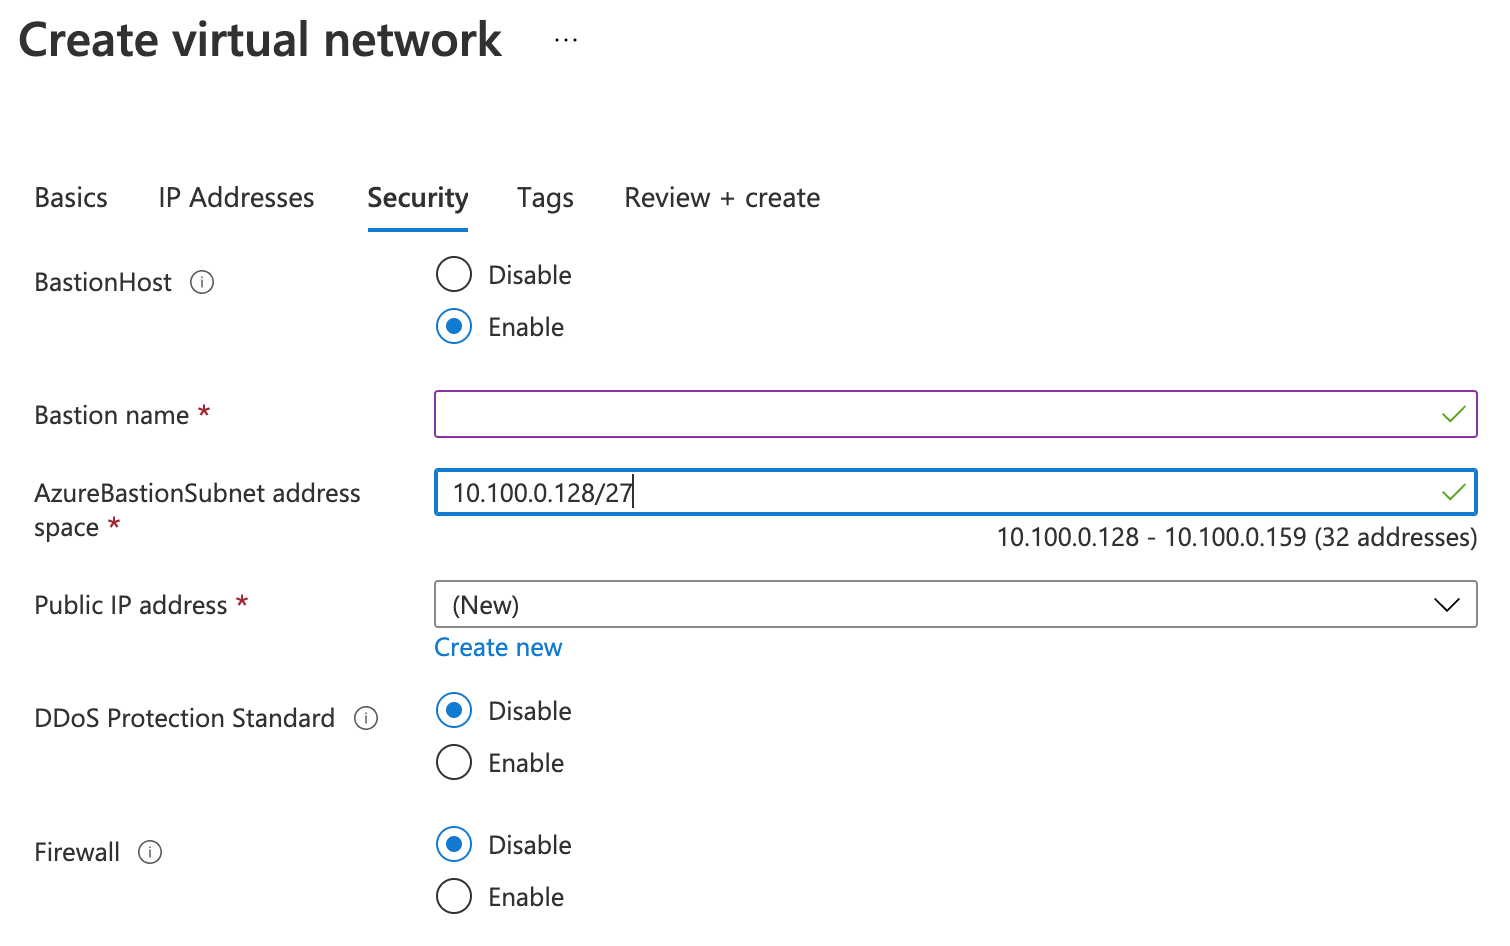
- Give the bastion a name of your choice.
- Use
10.100.0.128/27(10.100.0.128 - 10.100.0.159)asAzureBastionSubnetaddress space. Azure requires the exact nameAzureBastionSubnetfor the subnet to be used for the bastion. - Select Create New for the Public IP address field and give a name to it.
- Create two virtual machines: one to be used as Kubernetes master node and the other as a worker node.
- Use the latest Ubuntu Server LTS image.
- Standard_B2ms size with 2 vcpus, 8 GiB memory and 30 GiB disks will suffice for our learner's cluster.
- Use SSH public key authentication option with azureuser as username and use the SSH key created earlier as value for Use existing key stored in Azure option.
- Select None for Public inbound ports.
- Use the virtual network and default subnet created earlier in the networking options. Set Public IP to None. Select None for NIC network security group.
- Start the VMs and connect using Bastion option. Use azureuser as username, SSH Private Key from Local File as Authentication Type and select the previously saved pem file through Local File option.
Setting up Kubernetes cluster
Installations
Install the required software on both master and worker node VMs.
Install container runtime. We'll use CRI-O.
cat <<EOF | sudo tee /etc/modules-load.d/containerd.conf
overlay
br_netfilter
EOF

sudo modprobe overlay
sudo modprobe br_netfilter

# Setup required sysctl params, these persist across reboots.
cat <<EOF | sudo tee /etc/sysctl.d/99-kubernetes-cri.conf
net.bridge.bridge-nf-call-iptables  = 1
net.ipv4.ip_forward                 = 1
net.bridge.bridge-nf-call-ip6tables = 1
EOF

# Apply sysctl params without reboot
sudo sysctl --system

# Install CRI-O
OS=xUbuntu_20.04
VERSION=1.22
cat <<EOF | sudo tee /etc/apt/sources.list.d/devel:kubic:libcontainers:stable.list
deb https://download.opensuse.org/repositories/devel:/kubic:/libcontainers:/stable/$OS/ /
EOF
cat <<EOF | sudo tee /etc/apt/sources.list.d/devel:kubic:libcontainers:stable:cri-o:$VERSION.list
deb http://download.opensuse.org/repositories/devel:/kubic:/libcontainers:/stable:/cri-o:/$VERSION/$OS/ /
EOF

curl -L https://download.opensuse.org/repositories/devel:/kubic:/libcontainers:/stable/$OS/Release.key | sudo apt-key --keyring /etc/apt/trusted.gpg.d/libcontainers.gpg add -
curl -L https://download.opensuse.org/repositories/devel:/kubic:/libcontainers:/stable/$OS/Release.key | sudo apt-key --keyring /etc/apt/trusted.gpg.d/libcontainers.gpg add -

sudo apt-get update
sudo apt-get install cri-o cri-o-runc

# Start CRI-O
sudo systemctl daemon-reload
sudo systemctl enable crio --now
Install Kubernetes packages.
sudo apt-get update
sudo apt-get install -y apt-transport-https ca-certificates curl
# Download the Google Cloud public signing key
sudo curl -fsSLo /usr/share/keyrings/kubernetes-archive-keyring.gpg https://packages.cloud.google.com/apt/doc/apt-key.gpg

# Add the Kubernetes apt repository
echo "deb [signed-by=/usr/share/keyrings/kubernetes-archive-keyring.gpg] https://apt.kubernetes.io/ kubernetes-xenial main" | sudo tee /etc/apt/sources.list.d/kubernetes.list

sudo apt-get update
# install kubeadm, kubelet, and kubectl
sudo apt-get install -y kubelet kubeadm kubectl
# Pin the installed packages at their installed versions
sudo apt-mark hold kubelet kubeadm kubectl
Create a cluster
Run the following steps on master node VM.
# Make sure that your Pod network does not overlap with any of the host networks
sudo kubeadm init --pod-network-cidr 192.168.0.0/16

# Copy the join command printed in the output. We'll need it later on worker.

mkdir -p $HOME/.kube
sudo cp -i /etc/kubernetes/admin.conf $HOME/.kube/config
sudo chown $(id -u):$(id -g) $HOME/.kube/config

# Use Calico networking plugin
kubectl apply -f https://docs.projectcalico.org/manifests/calico.yaml
Confirm the master node is running: kubectl get node.

Run the following commands on worker node VM.
# Run the join command coped from master
sudo kubeadm join 10.100.0.4:6443 --token w5ukck.qhuw0s86gd7dsxv5 --discovery-token-ca-cert-hash sha256:31401ee3712a958829d846cf9d1417325f9c1508a8113549ef1a41a7ce2eee7d
If you forget to copy the join command, it can be regenerated on the master node using:
kubeadm token create --print-join-command.
Verify that the worker has joined the cluster by running kubectl get nodes again on master.

To stop the cluster, stop the worker node first followed by master node and other way round while starting up.
That's all for today. Happy coding! À bientôt 🙋♂️!
